> ## Documentation Index
> Fetch the complete documentation index at: https://rollout.com/docs/llms.txt
> Use this file to discover all available pages before exploring further.
# Salesforce
> Choose your Salesforce environment, then approve access.
## Configure the Salesforce OAuth application
Complete this section once before users connect Salesforce accounts. You need Salesforce permission to create and manage External Client Apps.
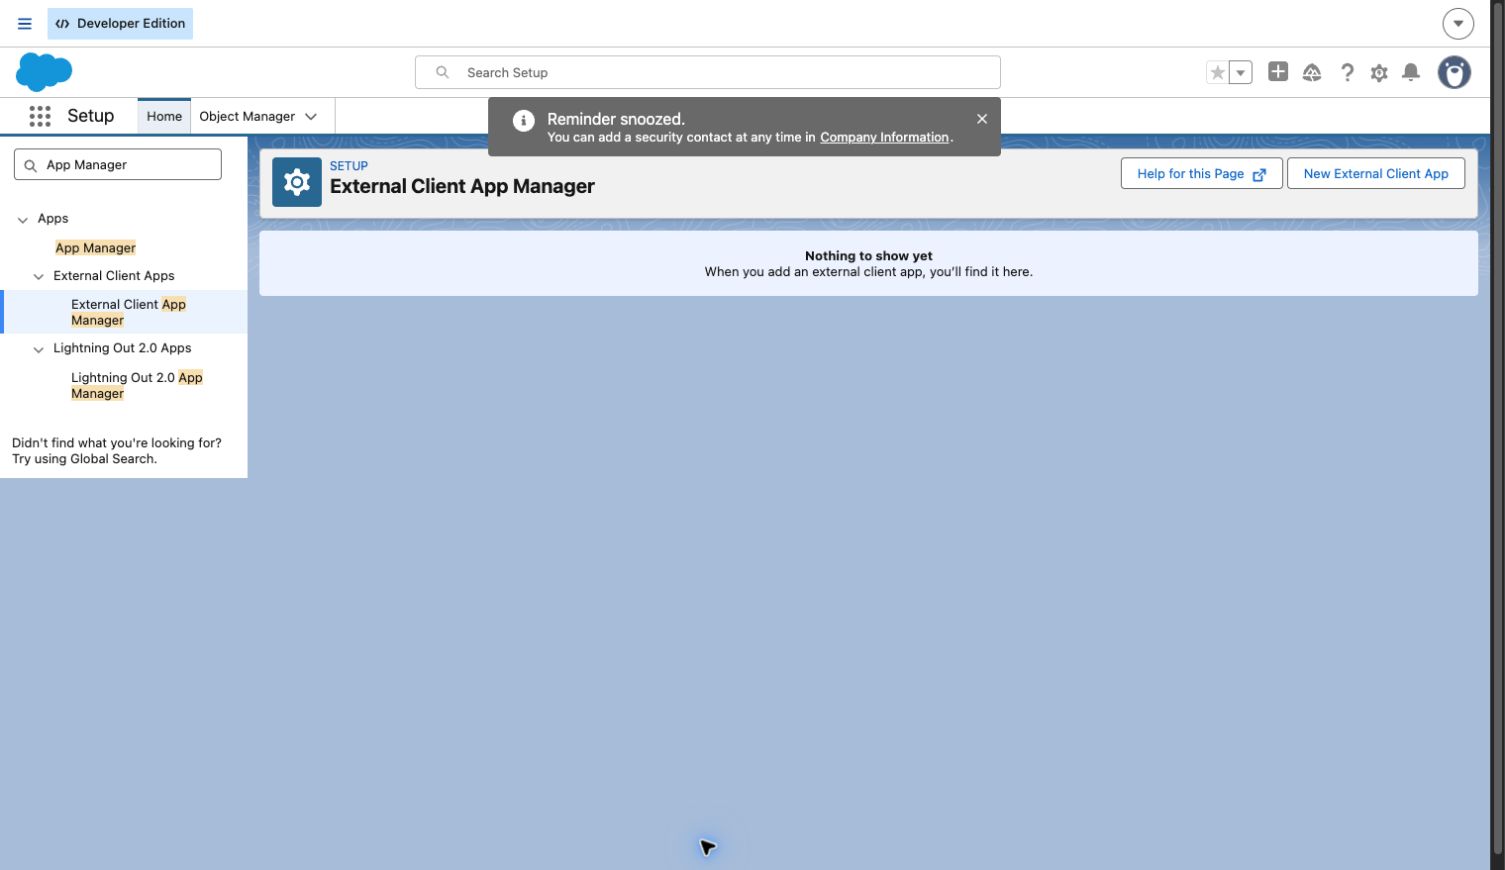
In Salesforce **Setup**, enter **App Manager** in **Quick Find**, then open **External Client Apps → External Client App Manager**. Select **New External Client App**.
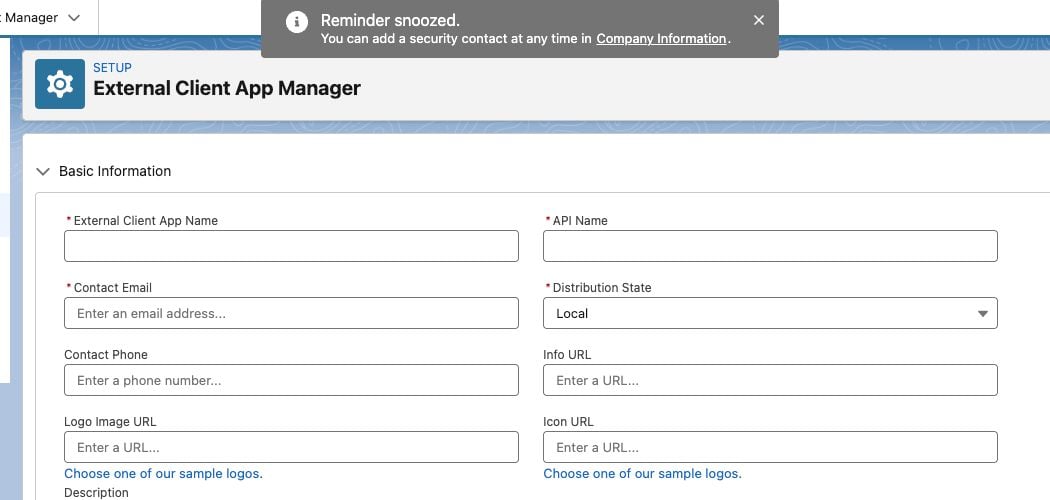
 Enter an application name, API name, and contact email. Keep **Distribution State** set to **Local** when the app is used only by this Salesforce organization.
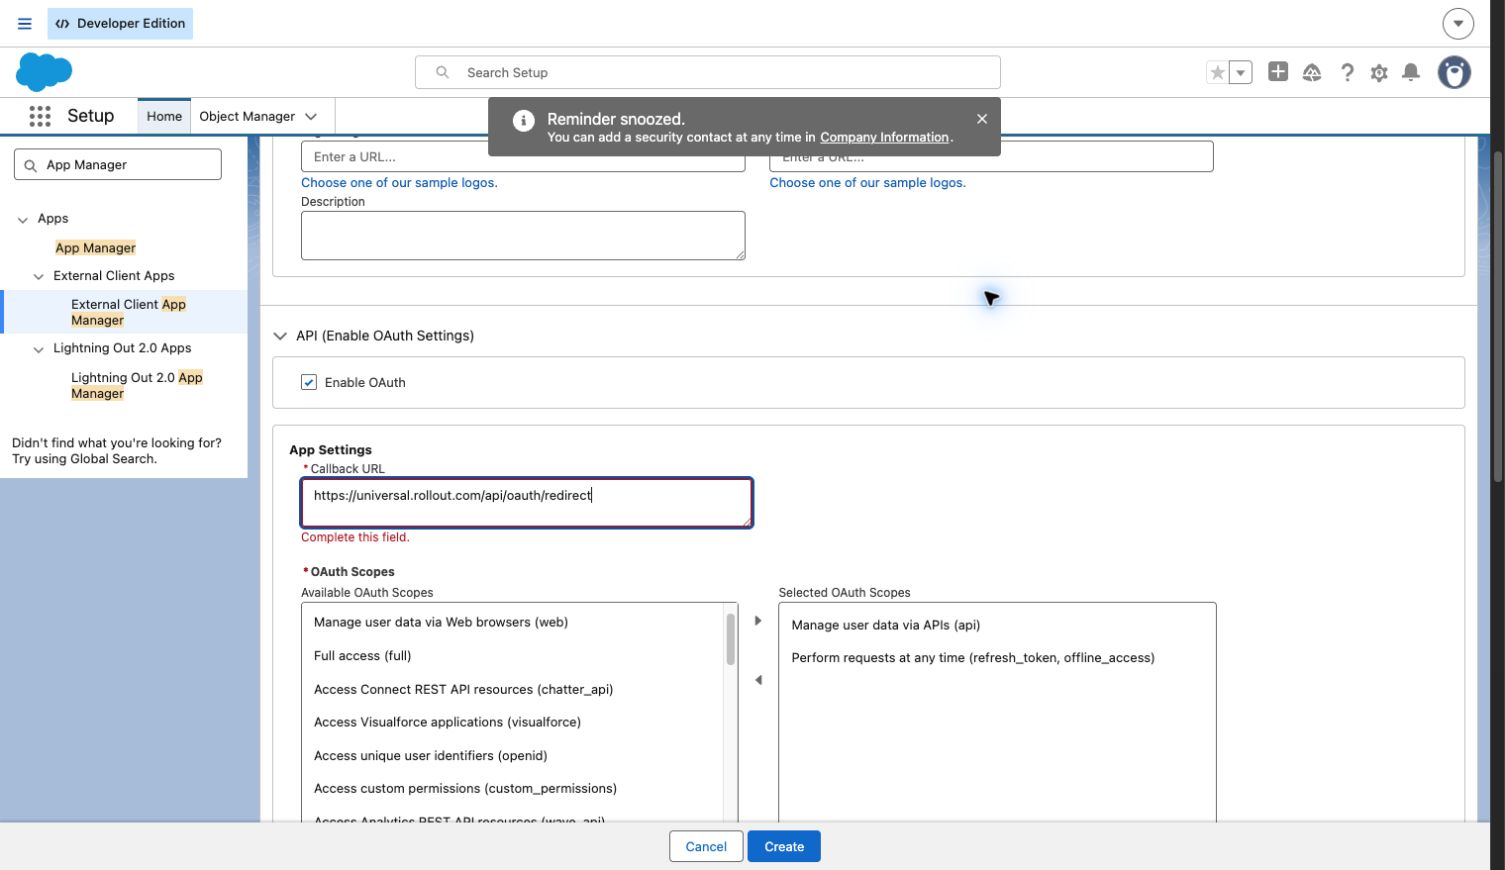
 Expand **API (Enable OAuth Settings)** and select **Enable OAuth**. Enter this callback URL:
```text theme={null}
https://universal.rollout.com/api/oauth/redirect
```
Move these permissions to **Selected OAuth Scopes**:
```text theme={null}
Manage user data via APIs (api)
Perform requests at any time (refresh_token, offline_access)
```
Expand **API (Enable OAuth Settings)** and select **Enable OAuth**. Enter this callback URL:
```text theme={null}
https://universal.rollout.com/api/oauth/redirect
```
Move these permissions to **Selected OAuth Scopes**:
```text theme={null}
Manage user data via APIs (api)
Perform requests at any time (refresh_token, offline_access)
```
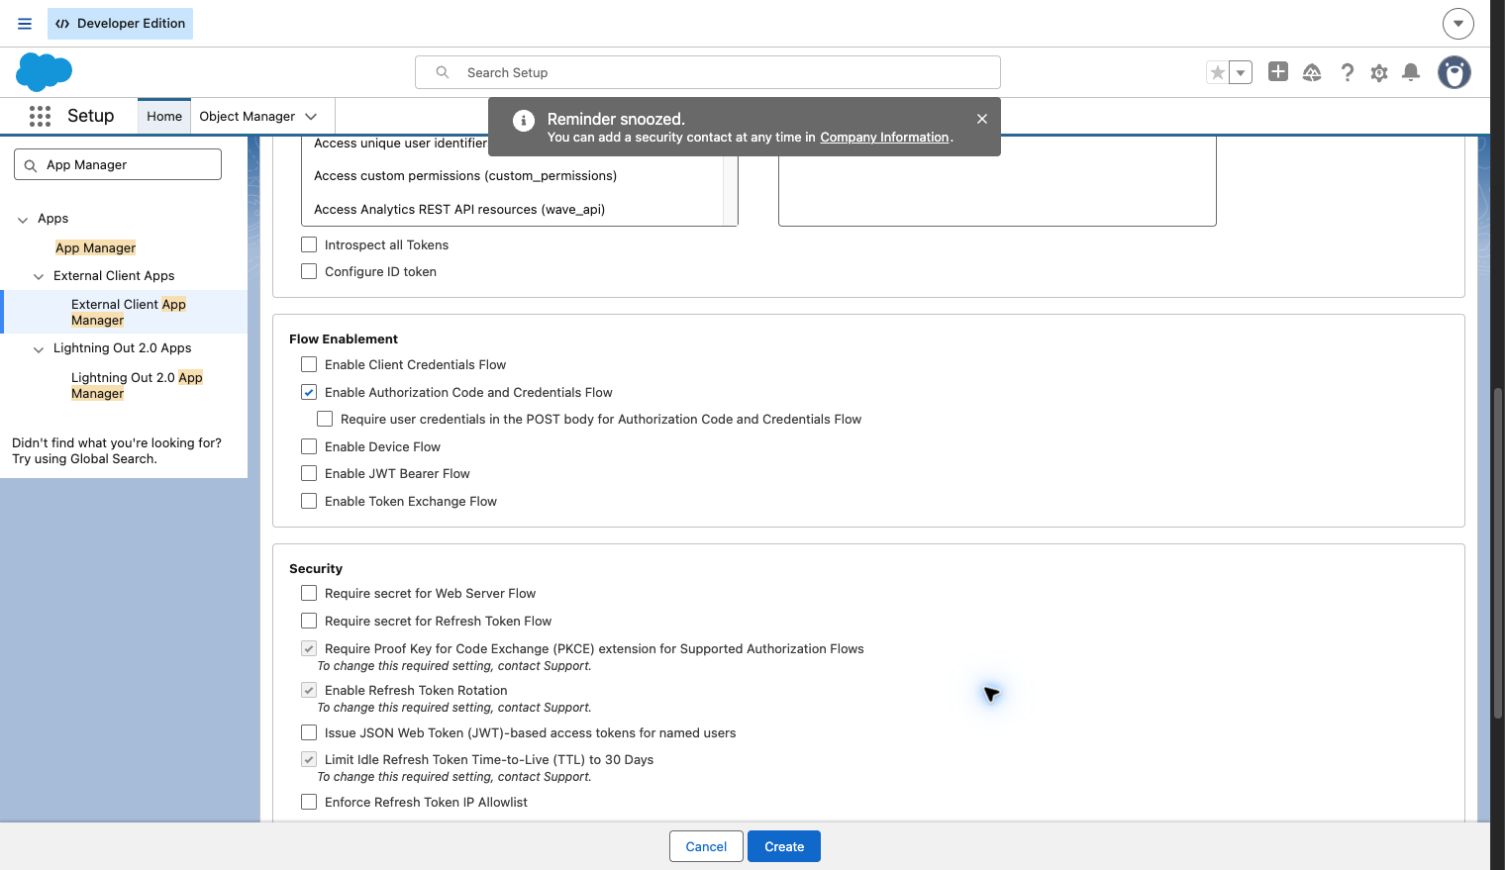
 Under **Flow Enablement**, select **Enable Authorization Code and Credentials Flow**. Keep Salesforce's required PKCE and refresh-token rotation settings enabled.
 Select **Create**. After Salesforce creates the app, open its **Settings** tab and select **Consumer Key and Secret**. Complete Salesforce identity verification, then copy the **Consumer Key** and **Consumer Secret**.
Use the Consumer Key as `SALESFORCE_CLIENT_ID` and the Consumer Secret as `SALESFORCE_CLIENT_SECRET` in the Rollout deployment configuration. Treat the Consumer Secret like a password.
Salesforce documents these settings in its [External Client App OAuth guide](https://help.salesforce.com/s/articleView?id=sf.configure_external_client_app_oauth_settings.htm\&language=en_US).
## Connect a Salesforce account
End users do not need to copy an API key or security token. Authorization happens in a secure Salesforce OAuth window.
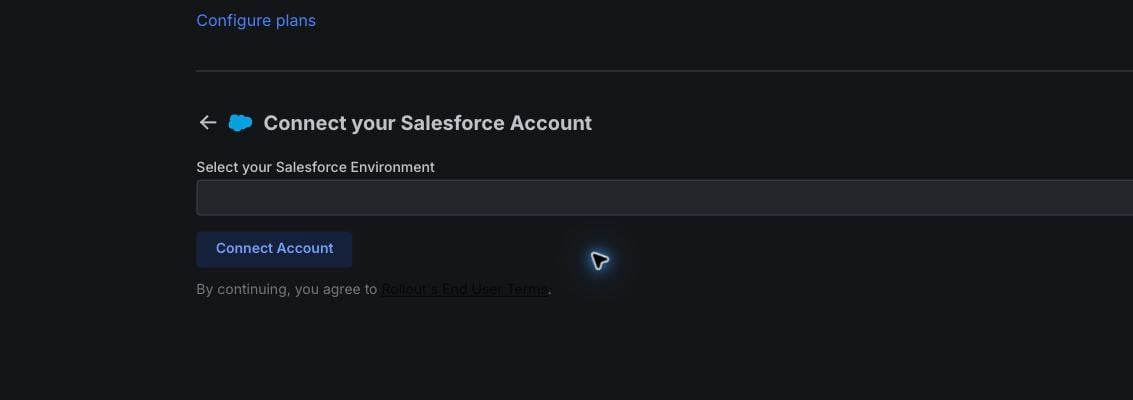
In the Salesforce connection window, select **Prod** for a production organization or **Sandbox** for a test organization, then select **Connect Account**.
Select **Create**. After Salesforce creates the app, open its **Settings** tab and select **Consumer Key and Secret**. Complete Salesforce identity verification, then copy the **Consumer Key** and **Consumer Secret**.
Use the Consumer Key as `SALESFORCE_CLIENT_ID` and the Consumer Secret as `SALESFORCE_CLIENT_SECRET` in the Rollout deployment configuration. Treat the Consumer Secret like a password.
Salesforce documents these settings in its [External Client App OAuth guide](https://help.salesforce.com/s/articleView?id=sf.configure_external_client_app_oauth_settings.htm\&language=en_US).
## Connect a Salesforce account
End users do not need to copy an API key or security token. Authorization happens in a secure Salesforce OAuth window.
In the Salesforce connection window, select **Prod** for a production organization or **Sandbox** for a test organization, then select **Connect Account**.
 Sign in with a Salesforce user that has access to the records you want to sync. Complete Salesforce verification if prompted.
Review the requested permissions and select **Allow**. The secure window returns you to the product when the connection is complete.
The Salesforce user must have REST API access. If authorization succeeds but the connection is rejected, ask a Salesforce administrator to check the user's edition, profile, and permission sets.
Sign in with a Salesforce user that has access to the records you want to sync. Complete Salesforce verification if prompted.
Review the requested permissions and select **Allow**. The secure window returns you to the product when the connection is complete.
The Salesforce user must have REST API access. If authorization succeeds but the connection is rejected, ask a Salesforce administrator to check the user's edition, profile, and permission sets.