> ## Documentation Index
> Fetch the complete documentation index at: https://rollout.com/docs/llms.txt
> Use this file to discover all available pages before exploring further.
# HighLevel
> Choose where to install the HighLevel app, then approve access.
## Before users connect: create the marketplace app
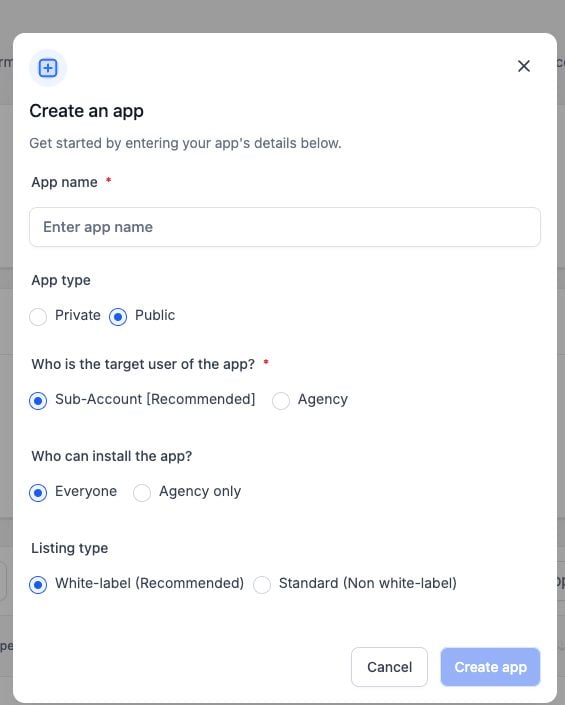
Sign into the [HighLevel Marketplace](https://marketplace.gohighlevel.com/). Open **App dashboard** or **My apps**, then select **Create app**.
 Name the app after the product you are connecting and select **Public**.
Under **Who is the target user of the app?**, choose:
* **Sub-Account** for an app that connects one location.
* **Agency** for an agency-level app that can manage multiple locations.
Keep the recommended installation and listing options unless your distribution requirements differ. If you support both connection types, create a separate app for each target user because Rollout uses separate OAuth credentials for Agency and Sub-Account connections.
Name the app after the product you are connecting and select **Public**.
Under **Who is the target user of the app?**, choose:
* **Sub-Account** for an app that connects one location.
* **Agency** for an agency-level app that can manage multiple locations.
Keep the recommended installation and listing options unless your distribution requirements differ. If you support both connection types, create a separate app for each target user because Rollout uses separate OAuth credentials for Agency and Sub-Account connections.
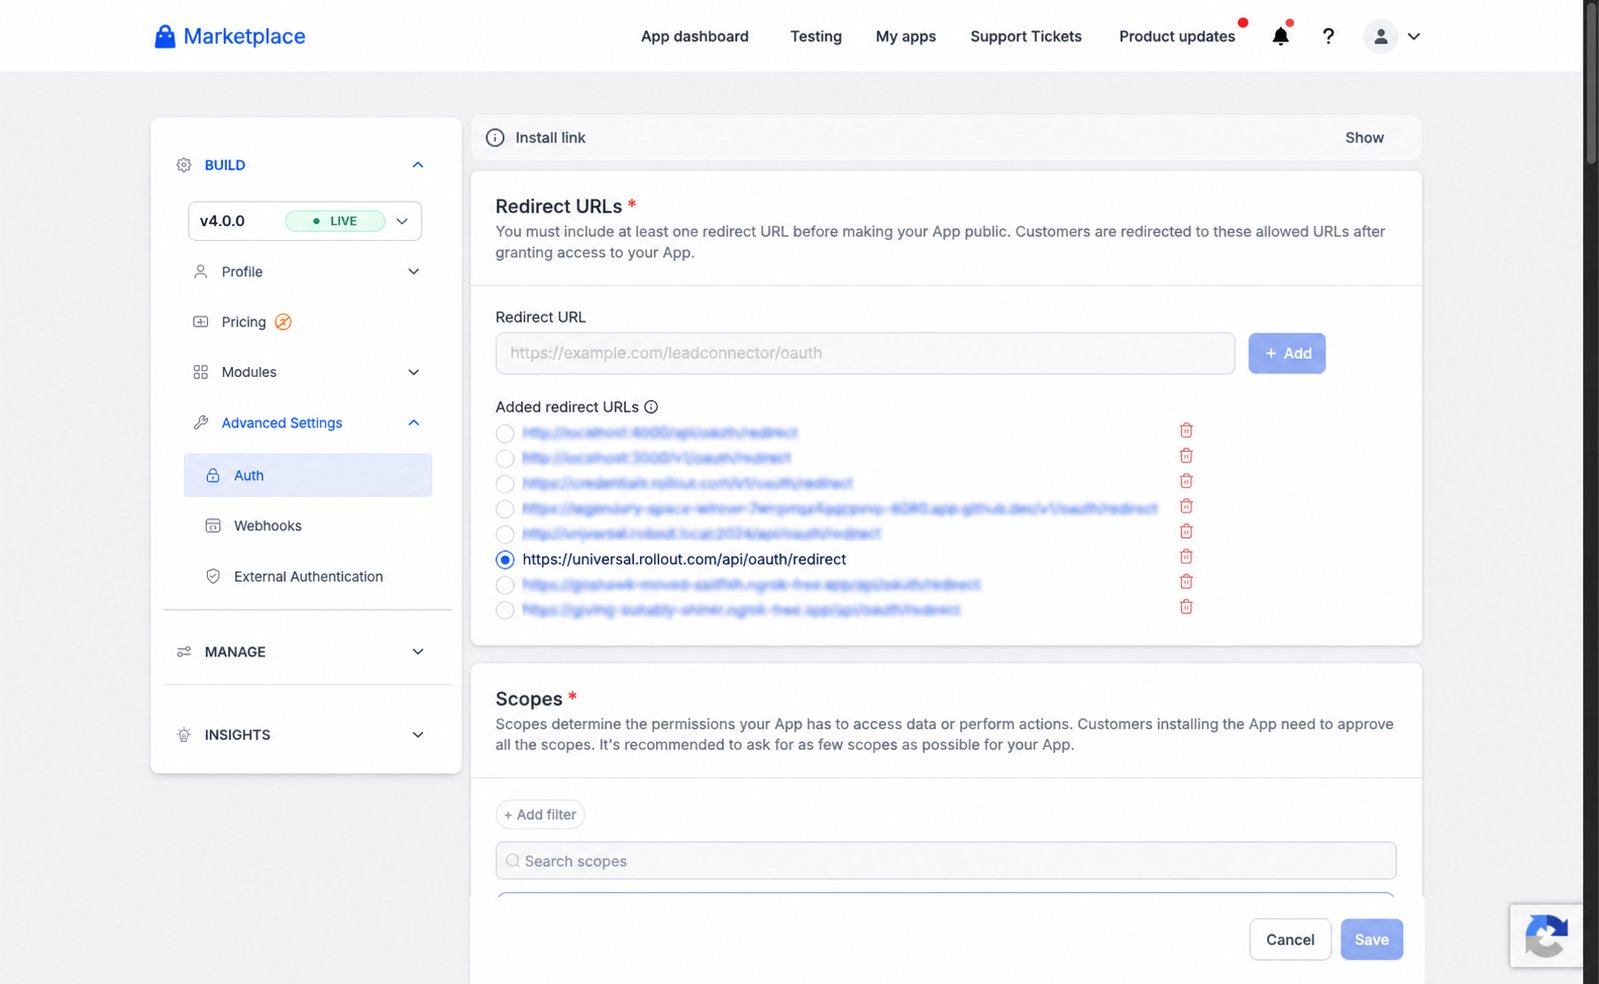
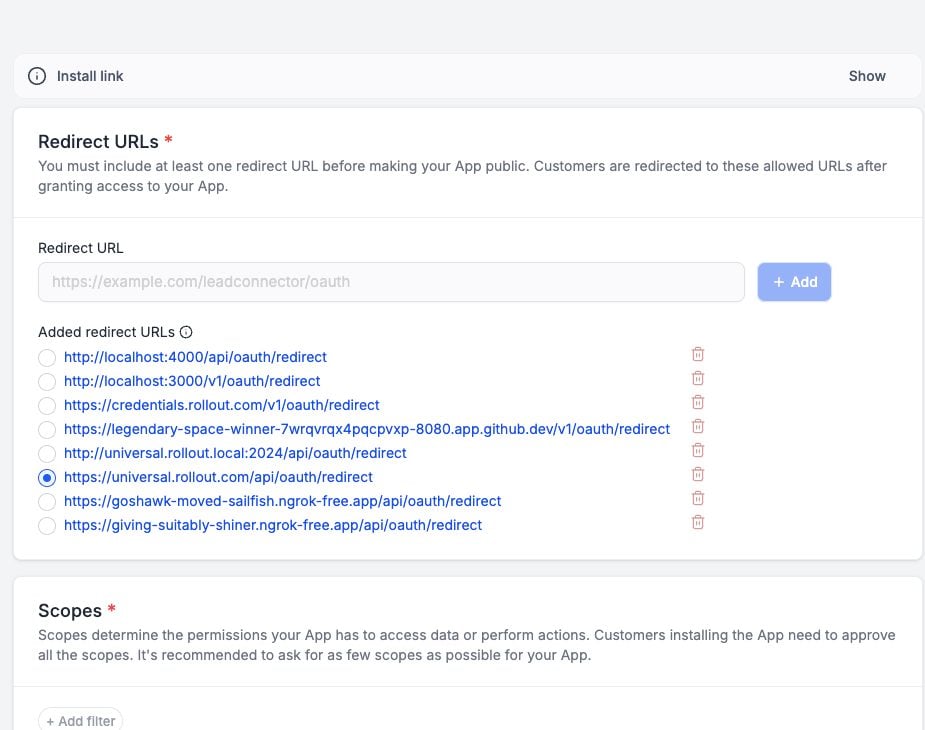
 Open the app, expand **Advanced Settings**, and select **Auth**. Add and select this production redirect URI:
```text theme={null}
https://universal.rollout.com/api/oauth/redirect
```
Open the app, expand **Advanced Settings**, and select **Auth**. Add and select this production redirect URI:
```text theme={null}
https://universal.rollout.com/api/oauth/redirect
```
 For a **Sub-Account / Location** app, enable:
```text theme={null}
contacts.write contacts.readonly conversations.readonly
conversations/message.readonly conversations/message.write
users.readonly users.write opportunities.write opportunities.readonly
```
For an **Agency** app, enable:
```text theme={null}
locations.write locations.readonly conversations.readonly
conversations/message.readonly conversations/message.write
contacts.write contacts.readonly users.readonly users.write
opportunities.write opportunities.readonly oauth.readonly oauth.write
objects/record.readonly objects/schema.readonly
associations/relation.write associations/relation.readonly
```
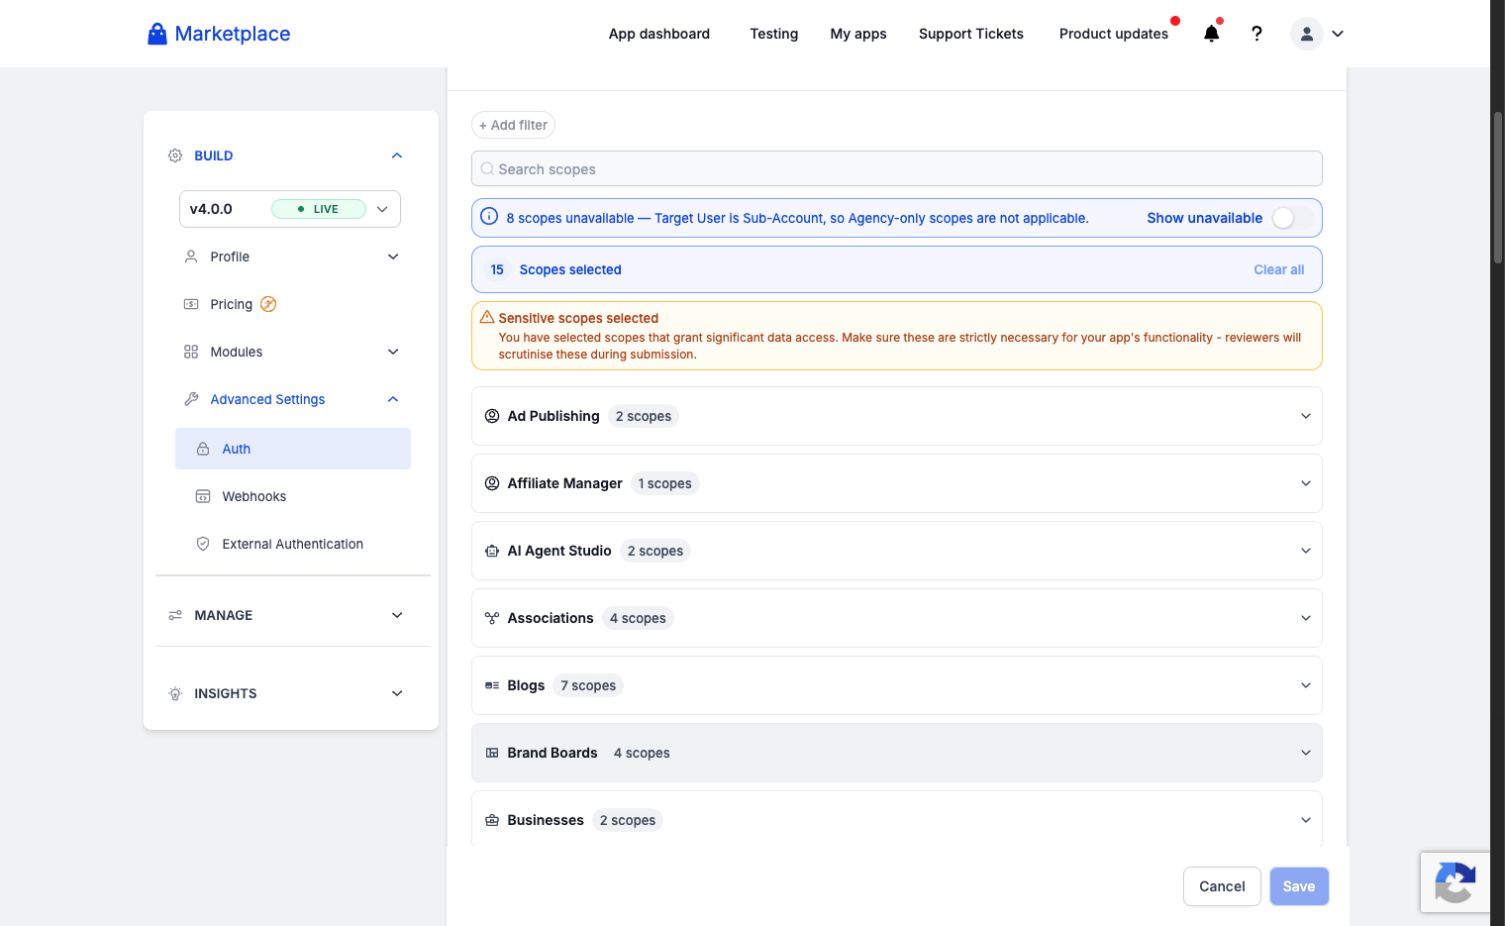
Use the scope search and category controls to select each permission. HighLevel displays the selected-scope count and flags sensitive permissions for review.
For a **Sub-Account / Location** app, enable:
```text theme={null}
contacts.write contacts.readonly conversations.readonly
conversations/message.readonly conversations/message.write
users.readonly users.write opportunities.write opportunities.readonly
```
For an **Agency** app, enable:
```text theme={null}
locations.write locations.readonly conversations.readonly
conversations/message.readonly conversations/message.write
contacts.write contacts.readonly users.readonly users.write
opportunities.write opportunities.readonly oauth.readonly oauth.write
objects/record.readonly objects/schema.readonly
associations/relation.write associations/relation.readonly
```
Use the scope search and category controls to select each permission. HighLevel displays the selected-scope count and flags sensitive permissions for review.
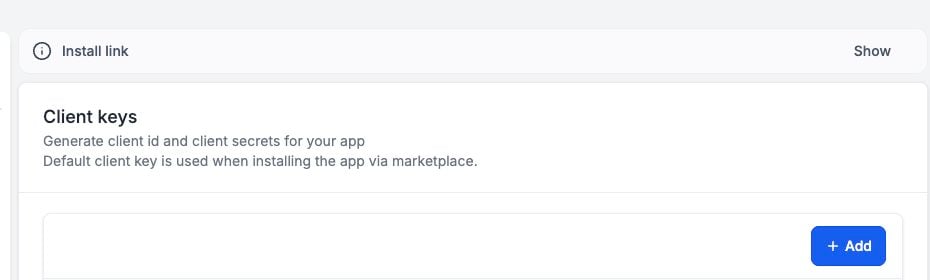
 After the app configuration is saved, expand **Manage** and select **Secrets**. Under **Client keys**, select **Add** to generate a Client ID and Client Secret.
 Copy the Client Secret immediately and store it in your password manager. HighLevel masks saved secrets.
Enter the Client ID and Client Secret in the matching **Agency** or **Sub-Account** HighLevel OAuth configuration in Rollout. Do not mix credentials from apps with different target-user types.
## Connect a HighLevel account
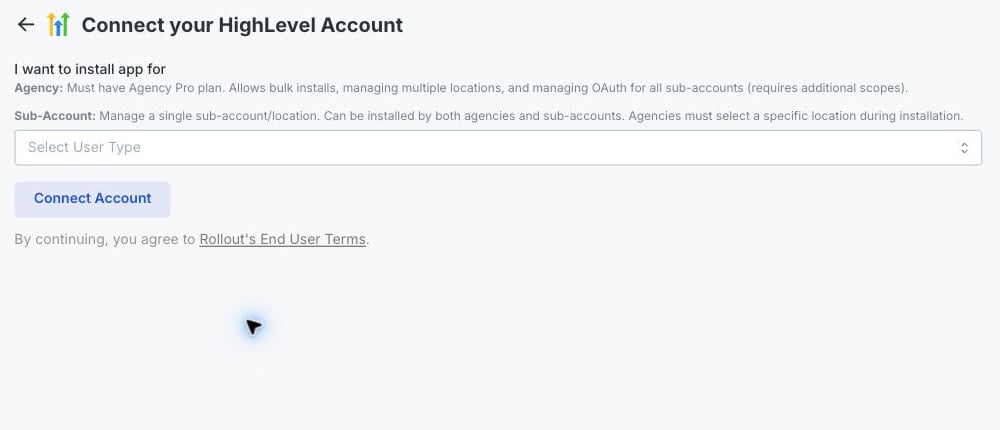
In the connection window, choose an installation scope:
* Select **Agency** to connect an Agency Pro account and manage its locations.
* Select **Sub-Account** to connect one location.
Then select **Connect Account**.
In the secure HighLevel window that opens, sign in with the account you want to connect.
Choose the agency or sub-account requested in the first step, review the permissions, then approve the connection.
The window closes and returns you to the product. Your HighLevel account is now connected.
Copy the Client Secret immediately and store it in your password manager. HighLevel masks saved secrets.
Enter the Client ID and Client Secret in the matching **Agency** or **Sub-Account** HighLevel OAuth configuration in Rollout. Do not mix credentials from apps with different target-user types.
## Connect a HighLevel account
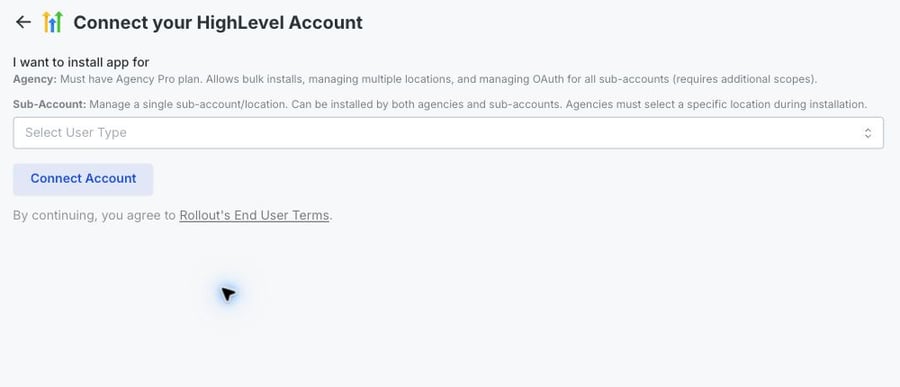
In the connection window, choose an installation scope:
* Select **Agency** to connect an Agency Pro account and manage its locations.
* Select **Sub-Account** to connect one location.
Then select **Connect Account**.
In the secure HighLevel window that opens, sign in with the account you want to connect.
Choose the agency or sub-account requested in the first step, review the permissions, then approve the connection.
The window closes and returns you to the product. Your HighLevel account is now connected.